
LIMS container type configuration is the process of defining virtual container records with precise physical and functional attributes to enable accurate sample tracking and automated workflow integration. Every molecular and genetic lab that runs samples through a LIMS depends on these definitions to tell the system what a container is, how it behaves, and where it fits in the storage hierarchy. Get this wrong and you face failed instrument integrations, broken chain of custody, and manual workarounds that defeat the purpose of having a LIMS in the first place. This lims container type configuration guide walks lab professionals through the full process, from pre-configuration audits to validation and best practices.
What does a LIMS container type configuration guide cover?
Container type configuration, sometimes called container type setup or container record definition, is the foundational layer of any LIMS sample management guide. Modern cloud-native LIMS systems use container types as base units in hierarchical storage, offering complete visibility from storage to result. That means every tube, plate, rack, and cryobox your lab uses must have a corresponding digital record before the system can track a single sample automatically.
The configuration process covers physical dimensions, volume capacity, material type, barcode format, labeling rules, and the parent-child relationships between containers. It also links container types to sample collection metadata, which is what allows the system to enforce compliance requirements at the point of accessioning. Labs that skip or rush this step spend weeks troubleshooting integration failures after go-live.

What do you need before configuring containers in LIMS?
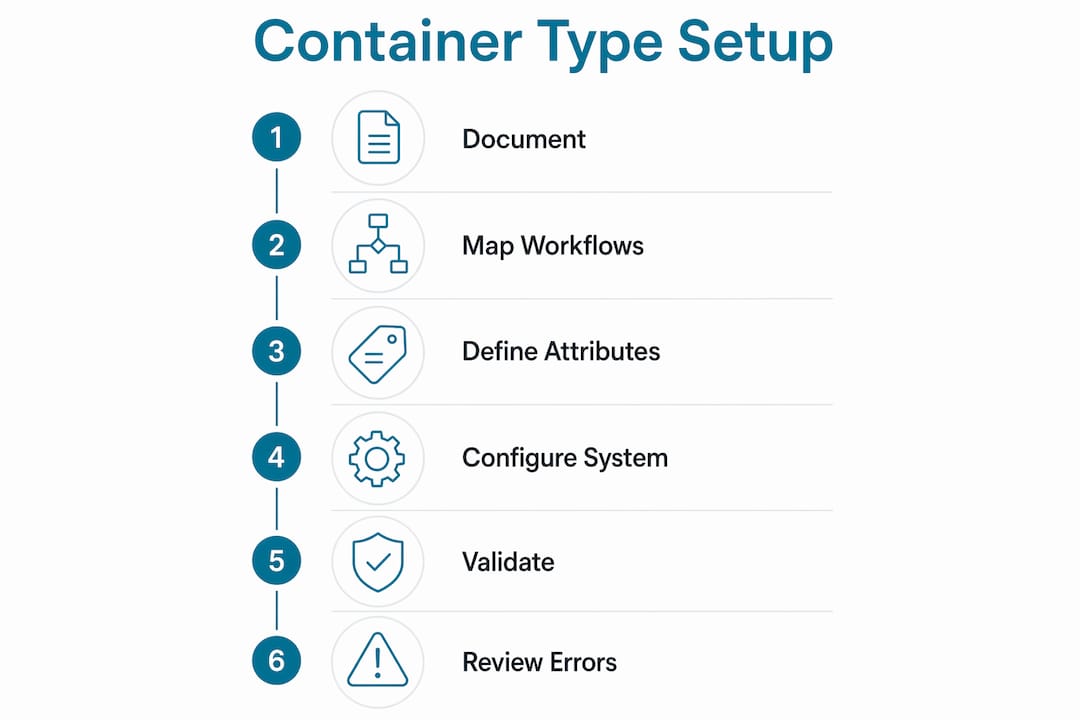
Preparation determines whether your configuration succeeds or requires expensive rework. A structured 4-step process improves configuration success: auditing containers, mapping workflows, defining attributes, and validating instrument integration. Standard setups complete configuration in under 5 business days. Complex integrations with multiple instruments take longer.
Start by physically auditing every container type your lab uses. Walk the bench and document:
- Container type (tube, plate, vial, bag, cassette)
- Volume and dimensions (height, diameter, footprint)
- Material (polypropylene, glass, cryogenic-rated plastic)
- Barcode format (1D linear, 2D DataMatrix, QR)
- Current labeling rules (pre-labeled, lab-printed, vendor-supplied)
- Instrument compatibility (which analyzers or liquid handlers accept this container)
Next, map your existing workflows. Identify every point where a container changes hands, changes location, or gets a new label. Pay special attention to informal workarounds your team has developed. These undocumented steps are exactly what your LIMS configuration must capture.
Collect instrument interface requirements from your instrument vendors before you open the LIMS administration console. Automated liquid handlers and analyzers have strict container footprint tolerances. Knowing these upfront prevents the most common integration failure at go-live.
| Attribute | What to define | Why it matters |
|---|---|---|
| Physical dimensions | Height, diameter, footprint in mm | Instrument compatibility and storage slot assignment |
| Volume capacity | Maximum and working volume in mL or µL | Prevents overfill errors and aliquot miscalculations |
| Material type | Plastic grade, glass, cryogenic rating | Preservation rules and storage temperature assignment |
| Barcode format | 1D, 2D, symbology standard | Scanner compatibility and label printing rules |
| Hierarchy role | Parent rack, child vial, plate well | Automated location tracking and chain of custody |
| Linked metadata | Collection type, preservative, GPS field | Regulatory compliance and sample record completeness |
Pro Tip: Create a physical container catalog with photos before you touch the LIMS. A visual reference prevents misidentification when you are entering dimensions and barcode formats into the system.
How do you define container type attributes in the LIMS admin console?
With your audit complete, you are ready to enter container type records. Container types are critical functional metadata that drive automated workflows. They must precisely reflect physical dimensions, volumes, and instrument compatibility. Follow this sequence for each container type:
- Create the container type record. Assign a unique name that matches your lab's physical labeling convention. Avoid generic names like "Tube A." Use names like "2mL Cryovial PP" or "96-Well PCR Plate."
- Enter physical parameters. Input height, outer diameter, and footprint dimensions in millimeters. Enter maximum volume and working volume in microliters or milliliters. Select material type from the system's controlled vocabulary.
- Configure barcode settings. Select the barcode symbology your lab uses (Code 128, DataMatrix, QR). Define whether the system generates barcodes or reads pre-printed vendor labels. Set the label template that will print when a new container is created.
- Define the hierarchy role. Specify whether this container type is a parent (rack, box, freezer shelf) or a child (vial, tube, well). Defining parent-child relationships beforehand prevents extensive rework and improves chain of custody tracking.
- Link to sample collection metadata. Attach the container type to the relevant sample record fields. Standard LIMS tie container types directly to sample record fields for chain of custody and regulatory compliance. For genetic and molecular labs, this includes collection type, preservative, and any required regulatory fields.
- Set access controls. Assign which user roles can create, modify, or retire containers of this type. This supports HIPAA-conscious data governance and prevents unauthorized changes to container records.
The comparison below shows how configuration depth differs between entry-level and full-featured LIMS platforms:
| Configuration feature | Entry-level platforms | Full-featured platforms |
|---|---|---|
| Physical dimension fields | Basic (volume only) | Complete (height, diameter, footprint, material) |
| Barcode configuration | Single symbology | Multiple symbologies with label template builder |
| Hierarchy support | Flat (no parent-child) | Multi-level parent-child with location tracking |
| Metadata linkage | Manual entry | Automated linkage to sample record fields |
| Access controls | Role-based read/write | Granular permissions per container type |
Pro Tip: Configure your most complex container type first. If the system handles a 384-well plate with a custom barcode and a linked metadata schema, simpler container types will be straightforward.
How do you validate container types with instruments and workflows?
Validation is where configuration meets reality. Misalignment in container settings often leads to failed instrument integration at go-live. Run validation before you move any real samples into the system.
Validation is not a one-time event at go-live. Every time you add a new instrument, change a barcode format, or modify a container hierarchy, you must re-validate the affected container types. Labs that treat validation as a checkbox activity pay for it in failed runs and data integrity incidents.
Work through these validation steps for each container type:
- Barcode scan test. Place a labeled container under every scanner in the lab, including handheld readers, instrument-integrated scanners, and label printers. Confirm the system reads and writes the correct container ID.
- Instrument compatibility test. Load the container into each instrument that will use it. Confirm the instrument accepts the container without errors, alarms, or positional failures.
- Workflow routing test. Create a test sample, assign it to the container type, and walk it through every workflow stage in the LIMS. Confirm the system routes the sample correctly based on container type.
- Hierarchy location test. Place a child container into its parent. Confirm the LIMS updates the sample location automatically and records the move in the audit log.
- Compliance field test. Verify that all required metadata fields populate correctly when a sample is accessioned into this container type. Check that chain of custody records are complete and accurate.
Involve bench staff in validation. They will catch positional errors and workflow gaps that administrators miss. Document every test result and keep the records as part of your LIMS validation package.
What are the most common mistakes in container type configuration?
The most damaging mistake is forcing lab workflows into generic container templates. Capturing undocumented workarounds in configuration ensures the system matches operational reality. Labs that skip this step end up with a LIMS that staff route around rather than use.
- Using vague container names. Names like "Small Tube" or "Plate 1" create confusion when staff select container types during accessioning. Use names that include material, volume, and format.
- Skipping parent-child hierarchy planning. Flat container structures break automatic location tracking. Every rack, box, and freezer shelf needs a defined parent record before child containers can be assigned to it.
- Ignoring instrument footprint tolerances. A container that is 0.5mm too wide for an automated liquid handler will cause positional errors that are difficult to diagnose after go-live.
- Omitting access controls. Leaving container type records open to all users creates audit trail gaps and increases the risk of accidental or unauthorized changes.
- Configuring without bench staff input. Lab technicians know which containers are actually used and which workarounds exist. Configuration built without their input will miss critical details.
LIMS method libraries, when linked to container types, enforce data integrity through structured workflows and approval stages. Building this linkage during initial configuration, rather than retrofitting it later, saves significant time.
Pro Tip: Schedule a "container walk" with two or three bench technicians before finalizing your configuration. Ask them to show you every container they use and every step they take that is not in the official SOP. Those gaps are your configuration requirements.
Key Takeaways
Accurate container type configuration is the single most important prerequisite for reliable LIMS sample tracking, automated workflow routing, and regulatory compliance in genetic and molecular labs.
| Point | Details |
|---|---|
| Audit before you configure | Document every physical container type, dimension, barcode format, and instrument requirement before opening the admin console. |
| Define complete attributes | Enter physical dimensions, volume, material, barcode settings, and access controls for every container type record. |
| Build parent-child hierarchies | Plan rack-to-vial and box-to-tube relationships upfront to enable automatic location tracking and chain of custody. |
| Validate with real instruments | Test barcode scanning, instrument compatibility, and workflow routing before moving live samples into the system. |
| Capture informal workarounds | Include undocumented bench workflows in your configuration to prevent staff from routing around the LIMS. |
Why container configuration is where LIMS projects succeed or fail
I have seen labs invest months in LIMS selection and then spend three days on container configuration. That ratio is backwards. The container type setup is where the system either reflects your lab or fights it.
The part that surprises most lab managers is how much the physical world constrains the digital one. You cannot configure a container type correctly from a spec sheet alone. The actual tube needs to go into the actual instrument, and someone needs to watch what happens. I have seen 2D barcodes that scan perfectly on a handheld reader and fail completely on an integrated plate reader because the label placement was off by a few millimeters.
The other thing I would push back on is the idea that you configure containers once and move on. Labs change. New instruments arrive. Vendors change barcode formats. A container type that worked perfectly in 2024 may need revision in 2026. Build a review cycle into your lab workflow design so container records stay current.
My strongest advice: involve your most skeptical bench technician in the configuration process from day one. That person knows every workaround, every exception, and every container that "technically works but shouldn't." Their knowledge is your most valuable configuration input.
— Tarek
Labrynix LIMS for genetic and molecular labs
Labs that need container type configuration built around real genetic and molecular workflows have a specific set of requirements that generic platforms do not address.

Labrynix LIMS is built from direct genetic and molecular laboratory experience. The platform supports container type setup, sample accessioning, workflow routing, instrument integration, and chain of custody tracking within a single connected system. LIMS solutions for genetic labs through Labrynix include role-based access controls, audit logs, and HIPAA-conscious data governance built into the container and sample management layer. Labs running pharmacogenomics, hereditary cancer testing, or molecular diagnostics can configure container types that link directly to test orders, patient records, and PGx reporting workflows. For labs evaluating a purpose-built option, the Labrynix LIMS platform provides a detailed overview of container management and workflow capabilities.
FAQ
What is a container type in LIMS?
A container type is a digital record that defines the physical and functional attributes of a lab container, including dimensions, volume, barcode format, and hierarchy role. The system uses this record to track samples automatically and route workflows.
How long does LIMS container configuration take?
Standard container type configuration completes in under 5 business days for straightforward setups. Labs with multiple instrument integrations or complex hierarchies require additional time for validation.
What is a parent-child container hierarchy in LIMS?
A parent-child hierarchy defines the relationship between storage containers, such as a freezer box (parent) and individual cryovials (children). This structure enables automatic sample location tracking and supports chain of custody documentation.
How do container types support regulatory compliance?
Container types link directly to sample record fields for collection metadata, preservative type, and custody information. This linkage enforces data completeness at accessioning and supports audit trail requirements under standards like HIPAA.
What causes container type integration failures at go-live?
The most common cause is misalignment between configured container dimensions and actual instrument footprint tolerances. Testing each container type in every instrument before go-live prevents positional errors and failed runs.