
A LIMS storage location tracking system is defined as a structured software configuration that maps every sample to a precise physical location using unique identifiers, hierarchical storage models, and automated audit trails. Labs that follow a disciplined lims storage location tracking setup guide reduce retrieval errors, satisfy ISO 20387 accreditation requirements, and maintain unbroken chain of custody from receipt to disposal. The core elements are consistent naming conventions, hierarchical location modeling, barcode or RFID scanning, and immutable event logs. Labrynix and other purpose-built platforms treat these elements as connected, not separate. Getting the setup right from day one prevents the free-text chaos that derails compliance audits later.
What does a LIMS storage location tracking setup require?
Effective lims tracking system setup starts before you touch any software configuration. Defining sample entities and metadata fields upfront is the single most important prerequisite. Labs that skip this step create free-text chaos that hinders reporting and compliance down the line.
Work through these prerequisites in order before configuring any location hierarchy:
- Sample and metadata definitions. Specify every field your lab needs: sample type, collection date, patient ID, test code, and storage requirements. Vague fields produce vague records.
- Hardware inventory. Gather barcode or RFID scanners, label printers capable of printing 2D DataMatrix codes, and compatible storage containers such as cryovials, racks, and freezer boxes.
- Naming conventions. Agree on a lab-wide standard before setup. A format like "FRZ-A.RK-05.BX-02.C3" is unambiguous and machine-readable.
- Role and permission mapping. Identify who can create locations, who can transfer samples, and who can view audit logs. Mapping roles and workflows before configuration prevents access conflicts later.
- Audit logging module. Confirm your LIMS includes a logging module that captures user ID, timestamp, and action type for every storage event.
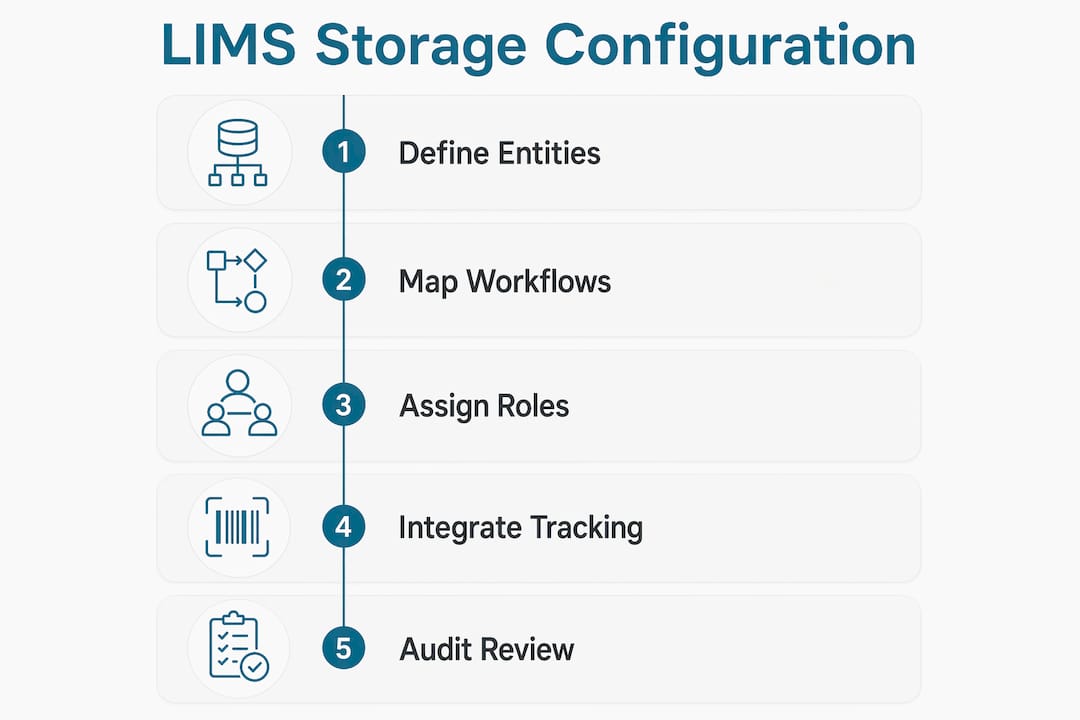
A structured LIMS implementation sequence that defines entities first, maps workflows second, assigns roles third, integrates instruments fourth, and trains staff last reduces errors and accelerates operational readiness. Following this order matters because each step depends on the one before it.
Pro Tip: Run a paper-based dry run of your naming convention with five real samples before entering anything into the system. Naming conflicts are far easier to fix on paper than in a live database.

How do you configure hierarchical storage locations in LIMS?
Hierarchical storage modeling is the backbone of any location tracking system. Effective hierarchical modeling lets you locate any vial within seconds using a path like "Freezer A > Rack 5 > Box 2 > Position C3." Without hierarchy, location data is just a label with no spatial context.
Follow these steps to build your location hierarchy:
- Define location types. Create top-level types first: buildings, rooms, or freezer units. Then define sub-types: racks, shelves, boxes, and individual positions.
- Assign unique location IDs. Every node in the hierarchy needs a system-generated or manually assigned ID that never changes. Avoid names like "Temp Freezer" that staff will reuse for different units.
- Set physical attributes. Record capacity, temperature range, and storage conditions for each location type. A freezer rated at -80°C should carry that attribute in the system, not just on a sticky note.
- Map sub-locations. Build the hierarchy downward. A freezer contains racks; a rack contains boxes; a box contains positions. Most LIMS platforms support this as a parent-child relationship.
- Enable visual mapping if supported. Grid-based visual maps of box positions reduce retrieval time and help staff confirm physical placement against the system record.
- Link to environmental monitoring sensors. Connecting storage locations to environmental sensors elevates tracking from basic location logging to automated compliance, with alert triggers for temperature excursions.
The table below shows a practical hierarchy model for a molecular diagnostics lab:
| Level | Example ID | Description |
|---|---|---|
| Freezer | FRZ-A | Ultra-low freezer, -80°C, Room 104 |
| Rack | FRZ-A.RK-05 | Rack 5 inside Freezer A |
| Box | FRZ-A.RK-05.BX-02 | Box 2 on Rack 5 |
| Position | FRZ-A.RK-05.BX-02.C3 | Row C, Column 3 inside Box 2 |
Pro Tip: Reserve position "A1" in every box as a reference blank or control sample slot. This gives staff an instant visual anchor when confirming box orientation during retrieval.
How do you implement barcode and RFID tracking for samples?
Assigning unique identifiers at the point of receipt is the rule, not an option. Barcode labeling with 2D DataMatrix codes is standard practice for high-density sample tracking because these codes survive cryogenic temperatures and condensation better than standard 1D barcodes.
Use this workflow to implement scanning across your storage operations:
- Label at accession. Print and apply a unique barcode or RFID tag to every sample container the moment it enters the lab. Never batch-label after the fact.
- Label storage units. Apply barcodes to cryovials, boxes, racks, and freezer doors. Scanning a freezer barcode before placing a sample confirms the correct destination in the system.
- Integrate scanners with LIMS. Connect barcode readers so that scanning a sample automatically populates the accession form, location field, and transfer record. Instrument integration eliminates the manual transcription step that introduces most location errors.
- Automate transfer workflows. Configure the system to require a scan-out from the current location and a scan-in to the new location for every transfer. This creates a timestamped movement record without any manual entry.
- Use RFID for high-volume freezers. RFID readers mounted at freezer doors can log every sample entering or leaving without individual scans. This is particularly useful in biobanks or reference labs processing hundreds of samples per shift.
Automated scanning eliminates manual entry errors and produces accurate custody records that manual logs cannot match. That accuracy is what regulators check during an ISO 20387 or GMP audit.
Pro Tip: Test every scanner at the temperature and humidity conditions where it will actually be used. A scanner that works at room temperature may fail near an open liquid nitrogen dewar.
How do you establish audit trails in LIMS storage tracking?
An audit trail in a LIMS context is an immutable, time-stamped log of every action taken on a sample or storage location. A comprehensive audit trail records each inventory event along with user details and timestamps, supporting ISO 20387 accreditation and full traceability. Immutable means no user, including administrators, can edit or delete a log entry after it is written.
Configure your audit trail to capture these event types:
- Sample receipt and accession
- Location assignment and reassignment
- Transfer between storage units
- Aliquoting events with parent-child sample links
- Retrieval for testing or shipment
- Disposal or destruction with authorization records
Each log entry must include the user ID, the exact timestamp, the action type, and an optional justification field for non-routine events. LIMS compliance tracking built on these records gives your lab forensic-grade evidence during regulatory audits.
A well-configured audit trail does more than satisfy regulators. It gives lab managers a real-time picture of sample movement, flags unauthorized access attempts, and provides the evidence needed to investigate any discrepancy. Treat it as a live operational tool, not a compliance checkbox.
Schedule a monthly review of audit logs with your quality team. Patterns in the data, such as repeated location corrections by the same user, often reveal training gaps before they become compliance findings.
What are the common pitfalls when setting up LIMS storage tracking?
Most setup failures trace back to a small set of avoidable mistakes. Knowing them in advance saves weeks of rework.
- Free-text location fields. Allowing staff to type location names manually produces variants like "Freezer A," "FrzA," and "freezer-a" for the same unit. Enforce dropdown selection from a controlled vocabulary from day one.
- Inconsistent naming after migration. Migrating legacy sample data without normalizing location names imports old inconsistencies into the new system. Deduplicate and standardize before import.
- Missing metadata at receipt. A sample logged without a storage temperature requirement or expiration date creates downstream retrieval and compliance problems. Make critical fields mandatory in the accession form.
- Undertrained staff. A system is only as accurate as the people using it. Run hands-on scanning drills before go-live, not just slideshow training.
- No verification step after setup. Physically audit 10% of logged sample locations after the first week of live operation. Discrepancies caught early are easy to fix; discrepancies found during an external audit are not.
Standard LIMS configurations can go live in under 5 days with pre-configured templates, but complex implementations take longer. Set realistic timelines with your team and build in a parallel-run period where the old and new systems operate simultaneously.
Pro Tip: Create a "location correction" workflow that requires a supervisor approval and a reason code before any location record can be changed. This discourages casual edits and keeps the audit trail clean.
Key Takeaways
Successful LIMS storage location tracking depends on structured data models, hierarchical configuration, automated scanning, and immutable audit logs working together from day one.
| Point | Details |
|---|---|
| Define metadata first | Structured sample and location fields prevent free-text errors that break compliance audits. |
| Build a true hierarchy | Model locations from freezer down to position so any vial is locatable within seconds. |
| Automate with barcodes or RFID | Scanning at every transfer eliminates manual entry errors and creates accurate custody records. |
| Configure immutable audit trails | Every storage event must log user ID, timestamp, and action type to satisfy ISO 20387 and GMP requirements. |
| Verify after go-live | Physically audit a sample of logged locations in the first week to catch discrepancies before they compound. |
Where most labs get LIMS storage tracking wrong
I have seen labs invest weeks in configuring beautiful hierarchical location trees, only to watch the whole system degrade within a month because staff defaulted to typing locations by hand. The technology is rarely the problem. The data discipline is.
The mistake I see most often is treating the naming convention as a detail to finalize later. It never gets finalized later. It gets improvised under pressure, and then you have three naming formats coexisting in a live database. Fix the convention before you touch the configuration screen.
The second mistake is disconnecting storage tracking from the broader lab compliance framework. Audit trails only have value if someone reviews them. Build a monthly log review into your quality calendar from the start, not after your first finding.
The labs that get this right share one habit: they treat the LIMS data model as a living document. They revisit it quarterly, update it when workflows change, and retrain staff when patterns in the audit log suggest drift. That iterative discipline is what separates a tracking system that works at go-live from one that still works two years later.
— Tarek
How Labrynix supports your storage location tracking setup
Labs building or upgrading their storage tracking system need software that handles the full configuration without forcing workarounds.

Labrynix LIMS is built for genetic testing and molecular diagnostics labs that need configurable storage hierarchies, barcode and RFID integration, role-based access controls, and audit trail logging in one connected platform. The system supports hierarchical location modeling from freezer to position, automated scan-based transfer workflows, and immutable event logs designed to support ISO 20387 and GMP compliance requirements. Labs working with genetic testing workflows get a platform built around real molecular lab operations, not adapted from a generic clinical template. Contact Labrynix to see how the platform fits your storage tracking requirements.
FAQ
What is LIMS storage location tracking?
LIMS storage location tracking is the systematic assignment of unique identifiers and hierarchical addresses to every sample and storage unit within a laboratory information management system. It enables real-time retrieval, chain-of-custody documentation, and compliance with standards like ISO 20387.
How long does it take to set up LIMS storage tracking?
Standard configurations can go live in under 5 days using pre-configured templates, though complex implementations with custom hierarchies and instrument integrations require more time. Building in a parallel-run period after go-live reduces risk.
Why is a hierarchical storage model better than flat location fields?
A hierarchical model, such as freezer to rack to box to position, lets staff locate any vial within seconds and makes bulk location queries possible. Flat location fields produce ambiguous records that slow retrieval and fail compliance audits.
What audit trail data does a LIMS need to capture?
Every storage event must log the user ID, timestamp, action type, and the before-and-after location state. This level of detail supports forensic review and satisfies GLP, GMP, and ISO 20387 audit requirements.
How do barcodes improve storage location accuracy?
2D DataMatrix barcodes applied at accession and scanned at every transfer automatically populate location fields in the LIMS, eliminating manual transcription errors and producing a complete, accurate custody record.