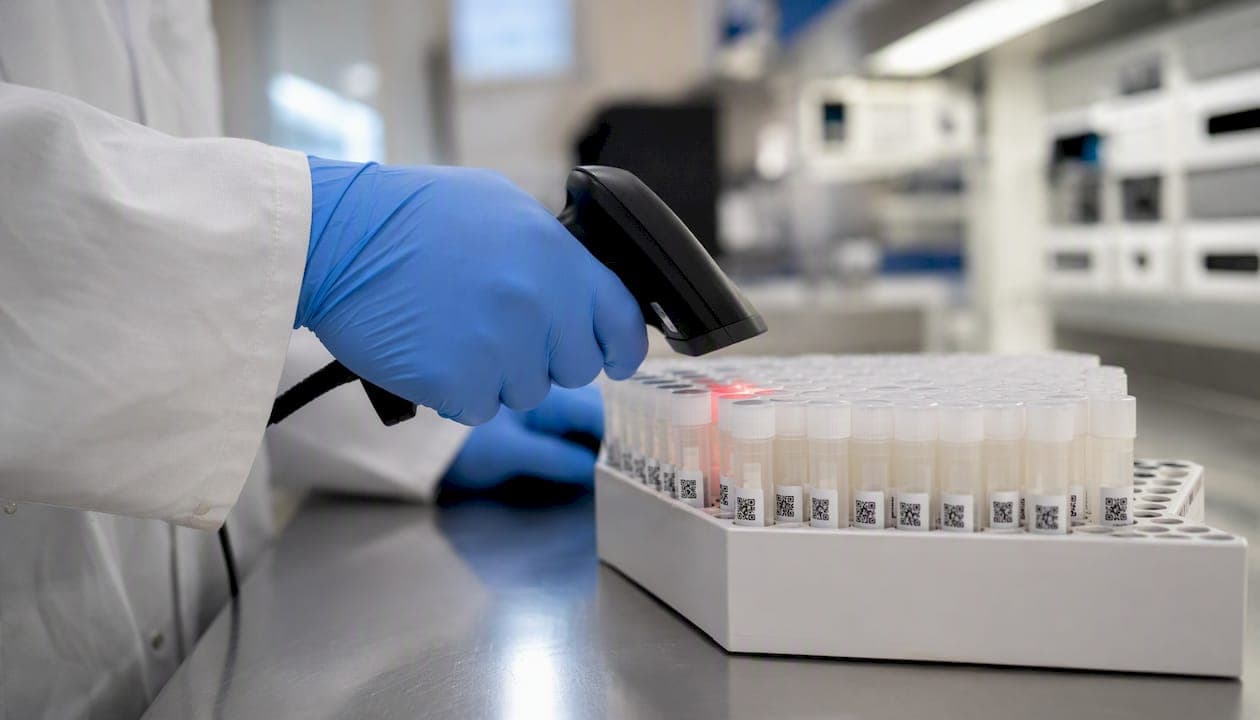
LIMS sample tracking is the auditable, end-to-end system that gives your lab a single source of truth for every sample's identity, location, status, and chain of custody across its entire lifecycle. LabKey defines a LIMS as software that assigns unique identifiers, records movement and custody, and creates a searchable, timestamped system of record that replaces spreadsheets and paper files. If your lab needs chain-of-custody documentation, freezer-level location coordinates, and a complete event history for every specimen, a LIMS is the standard platform for that job.
Three outcomes labs consistently get from a well-implemented LIMS sample tracking system:
- Visibility: Know exactly where every sample is, in real time, down to the box and position.
- Traceability: Reconstruct the full history of any sample, including who touched it, when, and why.
- Auditability: Export a timestamped, tamper-evident log that satisfies CAP, CLIA, or regulatory inspection requirements.
Pro Tip: Before evaluating any LIMS vendor, write down your three most painful sample-tracking failures from the past year. Use those scenarios as your acceptance tests during demos. Generic feature lists will not reveal whether a system handles your specific edge cases.
Key Takeaways
LIMS sample tracking is the standard platform for any regulated or high-volume lab that needs chain-of-custody documentation, freezer-level location coordinates, and a complete, exportable event history for every specimen.
| Point | Details |
|---|---|
| Lock naming conventions first | Standardize storage hierarchy names before importing any sample data to prevent ghost records and location mismatches. |
| Pilot before scaling | Run 50–200 samples through the full workflow to validate label templates, scanner ergonomics, and routing logic before mass migration. |
| Audit trail fields matter | Require timestamp, user ID, action type, and before/after values in every audit log entry to satisfy CAP, CLIA, and Part 11 expectations. |
| Integration is a test, not a claim | Verify HL7/FHIR and instrument connectivity with a live message exchange during the vendor demo, not from a feature list. |
| Labrynix for genetic labs | Labrynix connects accessioning, storage tracking, audit trails, and PGx reporting in one platform built for molecular and genetic testing workflows. |
Table of Contents
- What does LIMS sample tracking actually cover?
- How does accessioning prevent sample misidentification?
- Barcodes, QR codes, and RFID: which one fits your lab?
- How should you model freezer locations inside a LIMS?
- How do lifecycle states and configurable workflows route samples?
- What should your audit trail and chain of custody actually record?
- How do you track QC, environmental conditions, and freeze-thaw cycles?
- What goes on a label, and how does printing work from the LIMS?
- How should your LIMS connect to instruments and clinical systems?
- What reports and alerts should your LIMS generate?
- What security controls and regulatory requirements apply to LIMS sample tracking?
- How do you migrate legacy sample inventories into a LIMS?
- How do you evaluate a LIMS vendor for sample tracking capabilities?
- How Labrynix handles sample tracking for genetic and molecular labs
- What the Labrynix team has learned from real LIMS implementations
- Labrynix gives genetic labs a purpose-built sample tracking foundation
- Sources
What does LIMS sample tracking actually cover?
The phrase "sample tracking" covers far more than a location field in a database. LIMSWiki documents that modern LIMS support location hierarchies down to shelf, box, and slot level, barcode and RFID integration, freeze-thaw event logging, and close ties to audit trails and chain-of-custody records. The full feature map includes:
- Accessioning and unique ID assignment: Automatic generation of specimen identifiers at intake, with duplicate checks and required metadata fields.
- Label design and printing: On-demand or batch label generation from templates stored in the LIMS, with printer integration.
- Barcode, QR, and RFID support: Hardware-agnostic scanning for intake, movement, and retrieval.
- Storage location hierarchy: Modeling of freezer, rack, shelf, box, and position coordinates with visual maps.
- Inventory and aliquoting: Tracking of parent-child sample relationships, volumes, and aliquot provenance.
- Event history and audit trail: Timestamped log of every action, user, and value change.
- Chain of custody: Formal handoff records for transfers, shipping, and custody holds.
- Freeze-thaw and condition tracking: Cycle counts, temperature excursion logs, and container integrity notes.
- Integrations: Connections to instruments, EHR/EMR, LIS, billing, and environmental monitoring systems.
- Reporting and alerts: Dashboards, overdue-test flags, inventory reports, and automated notifications.
- Role-based security: Permissions that restrict who can view, edit, or release samples.
Feature checklist for vendor demos: confirm the vendor can demonstrate hierarchical storage modeling, configurable lifecycle states, exportable chain-of-custody reports, label template management, and API or HL7/FHIR connectivity before you move to a proof of concept.
Pro Tip: A biobank managing hundreds of thousands of specimens needs a different feature depth than a 20-person molecular lab running 500 samples per week. Scope your requirements to your actual throughput and regulatory obligations before comparing vendors. A system sized for a biobank will carry configuration overhead that slows down a small genetic testing lab.
How does accessioning prevent sample misidentification?
Accessioning is the first and most consequential step in the LIMS sample accession process. A misidentified sample at intake propagates through every downstream step, and no amount of tracking fixes a wrong ID that was accepted at the front door.
A typical accessioning sequence runs:
- Intake and metadata capture: Receive the specimen, record patient or study identifiers, collection date, specimen type, and test order.
- Duplicate check: The LIMS queries existing records to flag potential duplicates before assigning a new ID.
- Unique ID assignment: The system generates a unique accession number, often encoding lab prefix, date, and a check digit.
- Label printing: The LIMS triggers label generation immediately, so the physical specimen is labeled before it moves anywhere.
- Initial routing: The sample is assigned to a workflow queue, storage location, or instrument worklist based on test type and priority.
For ID format, 2D barcodes (Data Matrix or QR) carry more data in a smaller footprint than 1D barcodes and survive cryogenic conditions better when printed on appropriate label stock. Human-readable segments in the ID (lab code, year, sequence number) let staff visually verify a sample without a scanner. Check digits catch transposition errors during manual entry.
Mandatory fields are your primary defense against incomplete records. Configure the LIMS to block accessioning if required fields are empty, and use controlled vocabularies for specimen type and collection site to prevent free-text variation that breaks downstream queries.
Pro Tip: Use automatic ID generation for all routine samples and reserve manual ID entry only for samples arriving with a pre-assigned external ID (e.g., a referring lab's accession number). Manual entry is the leading source of duplicate and transposition errors in accessioning workflows.
Barcodes, QR codes, and RFID: which one fits your lab?
The right automatic identification technology depends on your throughput, environment, and budget. RFID adoption grows where automation and non-line-of-sight scanning justify higher up-front cost; barcode systems remain the most cost-effective, validated option for most clinical and molecular labs.
| Dimension | 1D Barcode | 2D Barcode (Data Matrix/QR) | RFID |
|---|---|---|---|
| Cost per label | Very low | Low | High |
| Line-of-sight required | Yes | Yes | No |
| Data capacity | Low (around 20 chars) | High (up to 2,000 chars) | High |
| Cryo compatibility | Depends on label stock | Depends on label stock | Limited (passive tags) |
| Read speed (batch) | Moderate | Moderate | Fast |
| Validation complexity | Low | Low | High |
| Typical use case | Tubes, plates, slides | Tubes, plates, cryo vials | Automated racks, freezer drawers |
RFID makes sense when you are scanning full racks or drawers without removing individual tubes, running automated storage systems, or managing a biobank where non-line-of-sight scanning saves significant labor. For most genetic testing and molecular diagnostic labs, 2D barcodes on cryo-grade label stock are the practical default.
Implementation details that matter: thermal transfer printers handle cryo labels better than direct thermal because the resin ribbon resists extreme cold. Zebra and Brady are widely used printer brands in lab environments. Validate your label-printer-LIMS integration as part of your IQ/OQ process, not as an afterthought.
Pro Tip: Test your chosen label material in your actual storage conditions before ordering in bulk. A label that survives liquid nitrogen is not the same as one that survives repeated freeze-thaw cycling in a -80°C freezer. Request sample labels from your vendor and run them through your worst-case storage scenario.
How should you model freezer locations inside a LIMS?
Physical storage modeling is where many LIMS implementations go wrong. The biobank LIMS guide on specimen tracking recommends separating physical storage entities from sample metadata and allowing unlimited custom attributes, which supports future-proofing and federated queries across studies.
The standard hierarchy is: Freezer > Rack > Shelf > Box > Position (row/column). Every level should have a unique, human-readable code that staff can read off a physical label without a scanner.
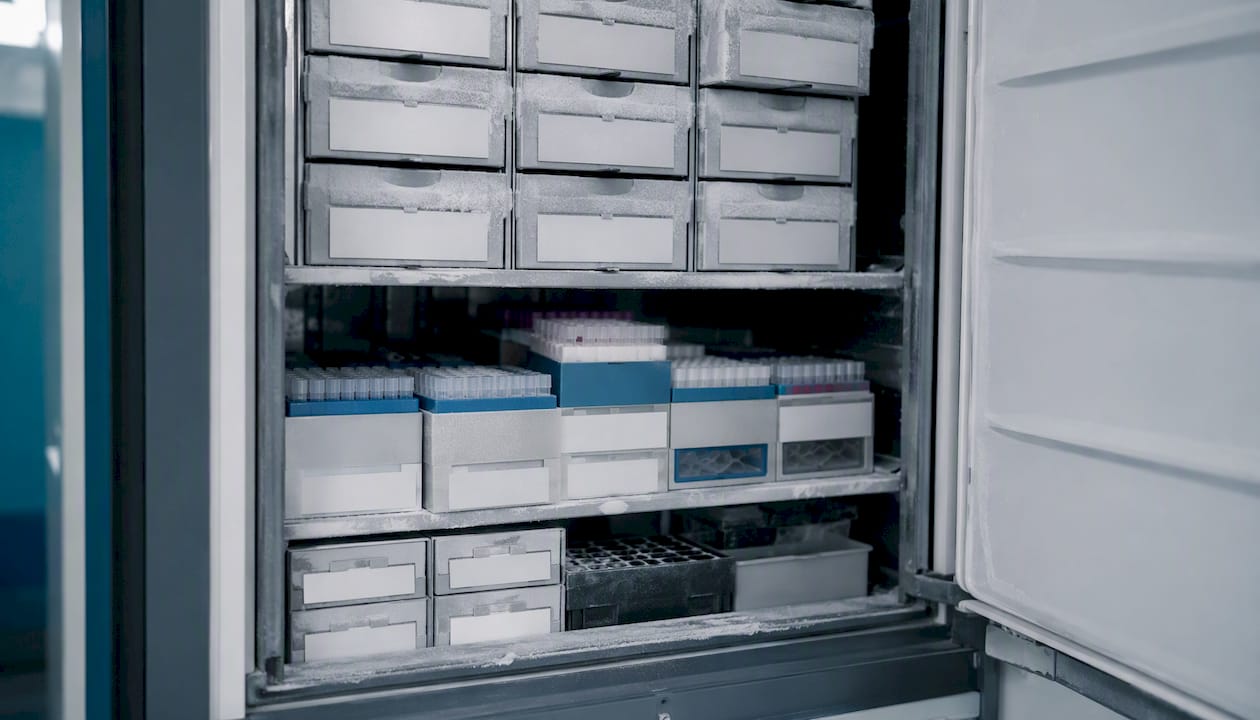
A minimal set of storage fields your LIMS should support:
| Field | Description |
|---|---|
| Container type | Freezer, rack, shelf, box, cryovial tray |
| Capacity | Maximum positions or volume |
| Location code | Unique alphanumeric identifier |
| Current occupancy | Count of filled positions |
| Temperature setpoint | Target storage temperature (°C) |
| Sensor link | Reference to environmental monitoring device ID |
| Status | Active, decommissioned, quarantine |
Standardize your naming conventions before you migrate a single sample. "Freezer A" and "FRZ-A" in the same database create two containers that are physically the same unit, and every sample assigned to one is invisible when you query the other.
Checklist for freezer audits and inventory reconciliation:
- Confirm physical sample count matches LIMS record for each box.
- Scan every tube and verify the LIMS location matches the physical position.
- Flag discrepancies as "location unknown" rather than deleting records.
- Document the audit date, auditor ID, and outcome in the LIMS.
Pro Tip: For a practical walkthrough of setting up storage hierarchies in a LIMS, the LIMS storage location tracking setup guide covers naming conventions, container records, and coordinate systems in detail.
How do lifecycle states and configurable workflows route samples?
A lifecycle state model gives every sample a defined status at any moment and controls which actions are permitted in each state. Common states in a genetic or molecular lab:
- Received: Physical specimen arrived; metadata not yet verified.
- Accessioned: Unique ID assigned, metadata complete, label printed.
- In Testing: Assigned to an instrument or analyst; results pending.
- On Hold: Testing paused pending additional information or QC review.
- Pending Review: Results generated; awaiting authorized sign-off.
- Released: Report or result delivered; sample available for storage or disposal.
- Disposed: Sample destroyed or returned per retention policy.
Configurable workflows map states to permitted actions and authorized roles. Only a lab director or senior technologist role might be permitted to move a sample from "Pending Review" to "Released," for example. That permission boundary is enforced by the LIMS, not by a policy document that staff may or may not follow.
Conditional routing handles priority samples and exceptions. A "Rush" flag can automatically move a sample to the front of the instrument queue. A rejected sample can trigger a re-accessioning workflow rather than simply disappearing from the queue. Smart4Diagnostics notes that tracking systems expose workflow gaps but do not by themselves enforce consistent execution without process redesign. Configuring lifecycle states is necessary but not sufficient; the underlying SOP must match the workflow logic.
Pro Tip: Draw your current sample workflow on a whiteboard before touching the LIMS configuration. Map every state, every handoff, and every exception path. Gaps in that drawing become bugs in your LIMS workflow if you skip this step.
What should your audit trail and chain of custody actually record?
An audit trail is only as useful as the fields it captures. Minimum required fields for a defensible chain-of-custody log:
- Event timestamp: Date, time, and timezone, to the second.
- User ID: The authenticated user who performed the action, not a shared login.
- Action performed: Specific event type (accessioned, moved, aliquoted, released, etc.).
- Previous value: The field value before the change, not just the new value.
- New value: The updated field value.
- Reason or comment: Free text or controlled vocabulary explaining the change.
- Workstation or device ID: The physical terminal or scanner that recorded the event.
Chain-of-custody entries for handoffs and shipping should additionally capture the receiving party's name or institution, the transfer method, and a custody-hold timestamp if the sample was quarantined during transit.
For regulated labs, chain-of-custody and audit logs must be exportable in vendor-neutral formats to support inspections and cross-system investigations. A PDF export that cannot be queried or filtered is not sufficient for a serious CAP or CLIA inspection.
| Export field | Purpose |
|---|---|
| Sample ID | Ties the log to the physical specimen |
| Event sequence number | Confirms log completeness (no gaps) |
| Timestamp | Establishes timeline for investigations |
| User ID and role | Confirms authorized action |
| Action type | Describes what happened |
| Before/after values | Proves what changed |
| Reason code | Supports deviation investigations |
How do you track QC, environmental conditions, and freeze-thaw cycles?
Sample integrity depends on what happens between accessioning and testing, not just at the endpoints. Fields to record for QC and condition tracking:
- Freeze-thaw cycle count, incremented automatically on each thaw event.
- Temperature excursion events, with timestamp, duration, and measured temperature.
- Aliquot provenance: which parent sample, which aliquot number, and remaining volume.
- Container integrity notes: visible damage, cap condition, hemolysis, or lipemia flags.
Environmental monitoring integration connects your freezer sensors directly to the LIMS so that a temperature alarm automatically creates a condition-flag event on every sample stored in that unit. Without that integration, a temperature excursion may be recorded in a separate monitoring system and never linked to the affected samples.
Automated alerts worth configuring: a freeze-thaw threshold alert (e.g., flag any sample exceeding three cycles), a temperature excursion alert tied to specific storage units, and an aliquot-volume alert when remaining volume drops below the minimum required for a test.
Pro Tip: Validate your freeze-thaw telemetry integration before go-live by simulating a temperature excursion in a test environment and confirming the LIMS creates the correct condition flag on the correct samples. This is one of the most commonly skipped validation steps, and it is the one most likely to matter during an inspection.
What goes on a label, and how does printing work from the LIMS?
A label is the physical link between the specimen and the LIMS record. A well-designed label includes:
- Unique accession ID in both human-readable text and 2D barcode.
- Patient or study identifier (truncated or pseudonymized per HIPAA requirements).
- Specimen type and collection date.
- Test code or panel abbreviation.
- Lab name or logo.
- User initials when required by SOP.
Printer types for lab environments: thermal transfer printers (Zebra ZD620, Brady BMP61) handle cryo-grade labels reliably. Direct thermal printers are lower cost but the print fades at low temperatures. For high-throughput labs, automated label applicators can print and apply labels to tubes in a single step.
Label templates should be stored and versioned inside the LIMS, not on individual workstations. On-demand printing triggers automatically at accessioning; batch label generation is useful for pre-labeling collection kits. Any change to a label template should go through a change-control process and be documented in the LIMS audit log.
Pro Tip: Print a test batch of 20 labels on your actual label stock and scan every one with your production scanner before finalizing a template. Barcode density, quiet zones, and font size all affect scan reliability, and a template that looks correct on screen can fail at the scanner.
How should your LIMS connect to instruments and clinical systems?
Integration is where sample tracking extends beyond the LIMS itself. Common integration targets for a genetic or molecular lab:
- Analyzers and sequencers: Bidirectional worklist and result transfer.
- LIS: Order and result routing between the LIMS and a laboratory information system.
- EHR/EMR: HL7 v2 or FHIR-based order intake and result delivery.
- Billing platforms: Claim and invoice status handoffs.
- Environmental monitoring: Temperature sensor data feeds.
- Shipping partners: Manifest and tracking number exchange.
| Integration type | Typical protocol | Data direction | Typical payload |
|---|---|---|---|
| Analyzer/sequencer | ASTM, vendor API | Bidirectional | Worklists, raw results |
| EHR/EMR | HL7 v2, FHIR R4 | Bidirectional | Orders, demographics, results |
| LIS | HL7 v2, flat file | Bidirectional | Orders, results, status |
| Billing platform | API, CSV | Outbound | Claim data, test codes |
| Environmental monitoring | API, MQTT | Inbound | Temperature, humidity |
| Shipping | API | Bidirectional | Manifests, tracking numbers |
Integration patterns to understand before vendor evaluation: push versus pull (does the LIMS send data, or does the external system request it?), middleware or message broker (a translation layer between systems), webhooks for event-driven notifications, and direct instrument drivers for plug-and-play analyzer connectivity.
Pro Tip: Ask every vendor to demonstrate a live HL7 order message flowing into the LIMS and a result flowing back out during your demo. Many vendors describe HL7 support in their marketing but have not implemented it for your specific EHR. A live demo with a test message is the only reliable test.
What reports and alerts should your LIMS generate?
Reporting turns raw tracking data into operational intelligence. Essential reports for sample tracking and inventory management:
- Open samples by status and assigned analyst.
- Inventory by storage location, with capacity utilization percentages.
- Freeze-thaw event log, filterable by sample ID, date range, and cycle count.
- Custody-change log for a specified sample or date range.
- Overdue tests: samples past their expected turnaround time.
- Retention and expiration list: samples approaching or past their disposal date.
Dashboard KPIs worth tracking: sample turnaround time (TAT) by test type, percentage of samples with missing or incomplete metadata, freezer capacity utilization by unit, and error rate by operator or workstation.
Alert rules that prevent problems before they become incidents: missing metadata flag at accessioning, temperature excursion notification tied to storage unit, overdue validation alert for samples in "Pending Review" longer than a defined threshold, and reconciliation mismatch alert when a physical scan does not match the LIMS location record.
The role of LIMS in genetic report delivery extends these alerts into the reporting workflow, connecting sample status directly to report generation queues so that a released sample automatically triggers the next step in the reporting pipeline.
What security controls and regulatory requirements apply to LIMS sample tracking?
Security and compliance are not optional features in a regulated lab. Core controls to verify in any LIMS:
- Role-based access control (RBAC): Permissions assigned by role, not by individual user, following the least-privilege model.
- Audit logs: Immutable, timestamped record of every data change, accessible only to authorized administrators.
- Encryption: Data encrypted at rest (AES-256 or equivalent) and in transit (TLS 1.2 or higher).
- Secure report delivery: Results delivered through authenticated portals, not unencrypted email.
- Session management: Automatic timeout, MFA support, and single sign-on (SSO) compatibility.
For HIPAA compliance, the LIMS must support the minimum necessary standard for PHI access, maintain access logs, and support Business Associate Agreement (BAA) execution with the vendor. CLIA recordkeeping requirements mandate that test records be retained for specific periods (two years for most tests, ten years for cytology). The role of LIMS in lab compliance covers these obligations in detail.
21 CFR Part 11 sets the FDA's requirements for electronic records and electronic signatures used in regulated environments. For a LIMS to satisfy Part 11, its audit trail must be computer-generated, time-stamped, and protected from modification; electronic signatures must be linked to their respective records and include the signer's name, date, and the meaning of the signature. Labs operating under GLP or GMP should confirm their LIMS vendor has documented Part 11 compliance evidence, not just a marketing claim.
FDA guidance on Part 11 defines the scope and application of these requirements. ISO standard 57284 provides additional standardization relevant to specimen handling and laboratory processes.
For genetic data specifically, data governance practices should include pseudonymization of patient identifiers in non-production environments, defined retention and expiration policies, and documented consent management for research specimens. LIMS patient data management guidance covers pseudonymization strategies in detail.
How do you migrate legacy sample inventories into a LIMS?
Data migration is the step that most labs underestimate. Experienced lab managers warn that failing to standardize naming conventions and storage hierarchy before scanning thousands of existing samples creates data migration headaches and "ghost" samples that are unlocatable in the physical inventory.
A stepwise migration approach:
- Map source fields to LIMS fields. Document every column in your spreadsheet or legacy system and its equivalent in the LIMS data model.
- Clean and normalize location names. Resolve all variants of the same freezer, rack, or box name to a single canonical form.
- Define unique-ID rules. Decide whether existing IDs are preserved, remapped, or replaced, and document the mapping.
- Import in batches. Start with 50–200 records, validate completely, then scale.
- Validate with physical spot checks. Pull 10% of imported records and physically locate the sample to confirm the LIMS location matches reality.
- Reconcile discrepancies. Flag unresolved records as "location unknown" rather than deleting them.
- Execute the go-live cutover. Freeze the legacy system, complete the final import, and confirm all staff are trained on the new workflow before the first production scan.
Migration checklist before go-live:
- Naming conventions locked and documented.
- Controlled vocabularies defined for specimen type, container type, and test code.
- Storage hierarchy agreed and entered into the LIMS before any samples are imported.
- Label templates tested end-to-end with production hardware.
- Barcode and RFID samples scanned through the full workflow in a test environment.
Pro Tip: Successful rollouts pair a small operational pilot of 50–200 items with process SOPs and then scale. The pilot validates naming conventions, label templates, and scanner ergonomics before you commit thousands of records to a configuration that may need revision.
How do you evaluate a LIMS vendor for sample tracking capabilities?
A vendor demo is a sales event. Your job is to turn it into a technical test. Vendor questions focused on sample tracking:
- Can the system model a five-level storage hierarchy (freezer, rack, shelf, box, position) with custom naming?
- How does the system log freeze-thaw cycles, and can that log trigger automated alerts?
- What label template formats are supported, and where are templates stored and versioned?
- Which barcode and RFID hardware has been validated with the system?
- What HL7 and FHIR versions are supported, and can you show a live message exchange?
- What does the chain-of-custody export look like, and in what formats can it be exported?
- What validation documentation (IQ/OQ/PQ protocols) does the vendor provide?
- How are concurrent scans handled, and what is the documented throughput limit?
Acceptance criteria to define before the demo:
- The system must locate any sample by accession ID, patient ID, or storage location within three seconds.
- The chain-of-custody export must include all required fields (timestamp, user ID, action, before/after values) in a queryable format.
- The system must handle your peak concurrent scan rate without timeout errors.
- Label templates must be modifiable by lab staff without vendor involvement.
Suggested demo test script: accession a new sample, print a label, scan it into a storage location, create an aliquot, move the parent to a new location, run a chain-of-custody report, and export the audit log. That sequence touches every core tracking capability in a single workflow.
| Evaluation criterion | What to test | Pass condition |
|---|---|---|
| Storage hierarchy | Create a five-level hierarchy | All levels visible and queryable |
| Freeze-thaw logging | Simulate a thaw event | Cycle count increments; alert fires |
| Label printing | Print from a stored template | Label scans correctly on production hardware |
| Chain-of-custody export | Export log for a test sample | All required fields present; format is queryable |
| HL7/FHIR integration | Send a test order message | LIMS creates the correct accession record |
| Concurrent scanning | Simulate peak scan rate | No timeouts; all records committed correctly |
How Labrynix handles sample tracking for genetic and molecular labs
Labrynix LIMS was built from real genetic and molecular laboratory experience, which means the sample-tracking architecture reflects the operational realities of hereditary cancer programs, PGx labs, and molecular diagnostic workflows rather than generic clinical lab assumptions.
Key sample-tracking capabilities in Labrynix:
- Accessioning and unique ID assignment: Configurable ID formats with duplicate checks, required metadata fields, and automatic label triggering at intake.
- Storage hierarchy modeling: Freezer-to-position location records with coordinate systems and inventory reporting.
- Barcode and QR support: Integration with standard lab scanners and label printers for on-demand and batch label generation.
- Lifecycle states and workflow queues: Configurable sample states with role-based action permissions and conditional routing for priority and exception cases.
- Audit trail and chain of custody: Immutable, timestamped event logs with exportable chain-of-custody reports.
- Role-based access control: Least-privilege permissions, configurable by role, with session management and audit log access controls.
- Labrynix Connect integrations: HL7, FHIR, APIs, webhooks, and instrument connectivity for EHR/EMR, LIS, billing, and analyzer integration.
- HIPAA-conscious and GDPR-conscious design: Secure report delivery, configurable permissions, and data governance support built into the platform architecture.
For genetic testing labs and hereditary cancer programs, Labrynix connects sample tracking directly to PGx report generation, provider portal delivery, and billing workflow visibility in one platform. That connection means a released sample automatically moves into the reporting queue without a manual handoff.
Implementation support includes migration assistance, validation documentation guidance, and operator training resources. Each laboratory remains responsible for its own clinical validation, regulatory compliance, and patient-care decisions.
Pro Tip: When evaluating Labrynix for a hereditary cancer or PGx workflow, ask specifically about the connection between sample status and report generation queues. That integration point is where many labs using disconnected tools lose time and introduce manual errors.
What the Labrynix team has learned from real LIMS implementations
The single most consistent mistake labs make before a LIMS rollout is treating the software configuration as the first step. It is not. The first step is agreeing on your storage hierarchy naming conventions and locking them before anyone touches the system.
Here is what that looks like in practice: a lab decides mid-migration that "FRZ-01" and "Freezer 1" are the same unit. They are not, in the LIMS. Every sample imported under one name is invisible when you query the other. Reconciling that after 10,000 records are imported takes longer than doing it right the first time.
Small pilot cohorts matter more than most labs expect. Running 50–100 samples through the complete workflow, from accessioning to storage to retrieval to disposal, before scaling reveals scanner ergonomics issues, label template gaps, and workflow routing errors that are trivial to fix at 100 samples and expensive to fix at 10,000.
Training cadence is the other underestimated variable. A one-time training session before go-live is not enough. Staff need a refresher after two weeks of production use, when the questions shift from "how do I do this?" to "why is the system doing that?" Build that second training session into your implementation plan.
One caution worth stating plainly: a LIMS makes your workflow visible. It does not make your workflow correct. If your current process has gaps, the LIMS will expose them. That is a feature, not a problem, but it means you need to redesign the process alongside the software configuration, not after.
Labrynix gives genetic labs a purpose-built sample tracking foundation
Generic LIMS platforms were built for broad clinical use. Labrynix was built for the specific operational demands of genetic testing, molecular diagnostics, and precision medicine labs, where sample-to-report traceability, PGx reporting, and provider portal delivery are not optional add-ons but core workflow requirements.
The difference shows up in the details: accessioning workflows designed for genetic test orders, storage hierarchies that connect directly to reporting queues, Labrynix Connect integrations for HL7 and FHIR that handle the order-to-result loop with EHR systems, and audit trails that satisfy the documentation expectations of CAP, CLIA, and HIPAA-conscious operations. Labs that need a focused LIMS, a connected LIMS-and-reporting workflow, or a full platform covering LIMS, PGx reports, portals, billing visibility, and AI-powered analytics can all find a configuration that fits.
To see how Labrynix handles your lab's specific sample-tracking workflow, request a demo or explore the solutions overview and connect with the team directly.
Sources
- Part 11, Electronic Records; Electronic Signatures — Scope and Application | FDA
- LIMS feature - LIMSWiki
- Biobank LIMS Guide: Specimen Tracking & Data Architecture
- Sample Tracking Systems: Types and Implementation Mistakes | Smart4Diagnostics
- ISO standard 57284